

How To Upload A File Into Citrix
ShareFile consist out of two unlike storage location, the Citrix Managed and the Customer Managed. The first one, the Citrix Managed storage location is hosted past Citrix in their public deject. The second one, the Customer Managed storage location is hosted by the customer in his own datacenter. In this article I'll go into the backup and restore procedures for the Customer Managed StorageZone.
Recycle Bin / Memory
Before I'll go into the backup and restore procedure, let me clarify how ShareFile processes deleted files and folder. Every file being uploaded to ShareFile is registered in the ShareFile Metadata. In case of a customer managed StorageZone, the ShareFile cloud just contains the metadata, but not the actual files. These files are stored within your datacenter. When a file or folder is deleted from ShareFile it will be kept in the recycle bin for 7 days, within these 7 days its very piece of cake to recover files. After vii days the deleted files and folder are purged from the recycle bin and permanently deleted from the persistent storage folder. Unfortunately the 7 days recycle bin retention fourth dimension cannot be changed, it's hard coded.
The 7 Days Recycle Bin retention fourth dimension is hardcoded at this fourth dimension
By default the metadata for deleted files will be kept for 3 year past Citrix. Although y'all are not able to modify this value yourself, Citrix can increase this value if needed for legal compliance. If you do demand to restore data, later 7 days, you'll need a on-site backup solution. So let's beginning with the ShareFile back-upwards.
Fill-in
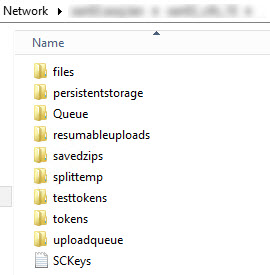
On your customer managed StorageZone, all data is located on a CIFS Share which should be accessible by all StorageZone Controllers. Yous will need to backup the persistent storage location once a mean solar day or according to your own backup requirements. Depending on the environment this can exist quite a large amount of data which needs to exist backed up. A daily full backup probably isn't the best approach, I would suggest using incrementals.
Backup your persistentstorage binder, preferable using incremental backups
Although the CIFS Share being used contains several folders, simply the persistentstorage folder needs to exist backed upwardly!
Recovery Queue
Before files and folder can be restored, the StorageZone controller demand a one-time preparation, a recovery queue needs to be created. For additional information take a look at the eDocs "Ready StorageZones Controller for file recovery", simply roughly this needs to exist done:
- On the StorageZones Controller, run PowerShell as an ambassador
- Alter the PowerShell execution policy to RemoteSigned :Set-ExecutionPolicy RemoteSigned
- Verify the CLRVersion is at least iv.0 :$psversiontable
- Run PowerShell using the "Network Service" account, which can be accomplished with Sysinternals PsExec :PsExec.exe -i -u "NT Authorisation\NetworkService" C:\Windows\SysWOW64\WindowsPowerShell\v1.0\powershell
- Browse to the disaster recovery folder:cd 'C:\inetpub\wwwroot\Citrix\StorageCenter\Tools\Disaster Recovery'
- Import the ShareFile recovery module :Import-Module .\Recovery.psm1
- Create a recovery queu :New-SCQueue -name recovery -operation recovery
Subsequently creating the recovery queue we need to customize the PowerShell recovery script.
Recovery Script
The recovery script "DoRecovery.ps1" contains 2 important variables which demand to exist configured:
- $backupRoot
- $storageRoot

The $BackupRoot variable should incorporate the fill-in location, which tin be used to restore data. In our case this is the Veeam server, where we mountain backups. Continue in mind you need to grant the "Network Service" account access to this location. The DoRecovery.ps1 script will be executed as "Network Service" .
Grant the "Network Service" business relationship access to the $backupRoot location
The second variable, $StorageRoot should incorporate the StorageZone location used by the StorageZone Controller. Now everything is in identify we can first restoring files and folder which where deleted more than than vii days agone
Restore Files & Folders
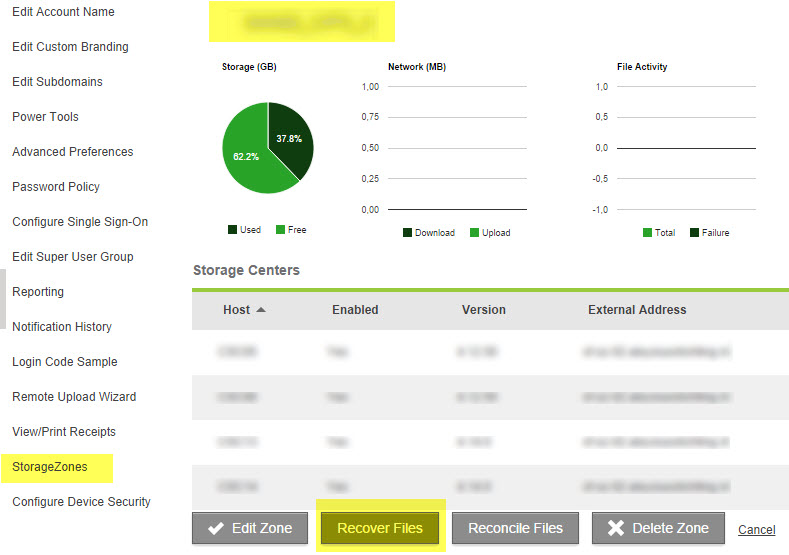
To select the file(southward) and folder(south) which should exist restored nosotros starting time need to log-in to the ShareFile account. Select Admin > StorageZones > Select the customer managed storagezone > Click "Recover Files".
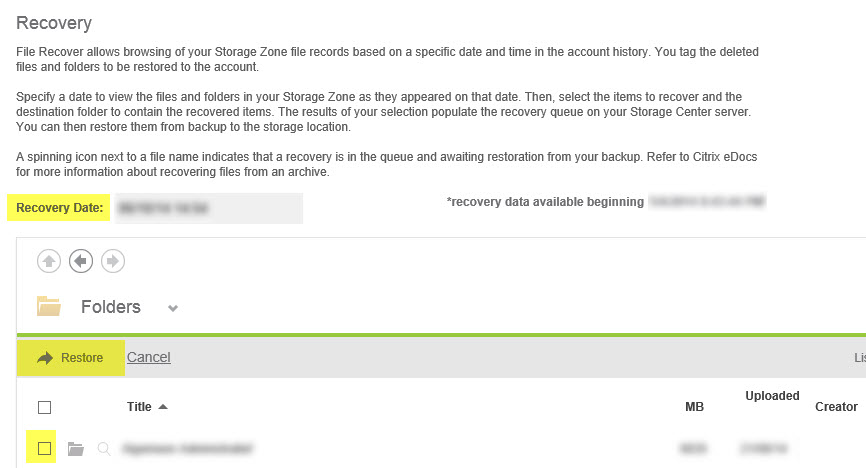
The Recovery screen volition display your accounts metadata and allows you lot to select the files and files which need to exist recovered. Start by selecting the desired data, and then the needed files and binder, concluding y'all click Restore.
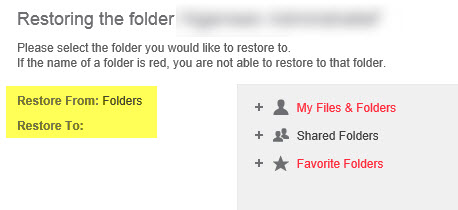
Next you need to select the location inside ShareFile where the files will be restored. The folder which are marked ruby can't be selected to restore files. It'south also not possible to overwrite existing folders!
Operation in Progress "Recover"
After selecting the files and folders which need to be restored, the selected content is visible in ShareFile right abroad. If y'all take a closer await at the files you'll notice a spinning icon on the right side, which reports "Performance in Progress". Although the files are visible at this point we are only seeing the metadata, the underlying files aren't available yet.
Recover Queue
Soon as the Restore Button is clicked the ShareFile Recovery procedure starts and the Recovery queue, which we created earlier, is filled with files.
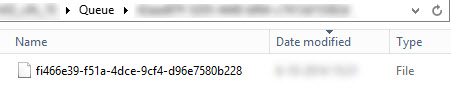
The file name within the queue does not chronicle to the actual files being restore, it's just a recovery job, which contains all the necessary data to recover the files. If you need the actual file name being restored from the fill-in only open the file with notepad. The file contains all kinds of useful info, including the FileID for the files which is going to be restored.

Now that the recover queue on the StorageZone controller is filled with one or more recovery jobs we are able to showtime the recovery procedure.
DoRecovery.ps1
For ShareFile to start the recovery process we need to run the script DoRecovery.ps1, which also needs to run under the "Network Service" business relationship. To reach this you lot'll need to :
- Open a control prompt every bit administrator
- Commencement PowerShell nether the "Network Service"account :PsExec.exe -i -u "NT Say-so\NetworkService" C:\Windows\SysWOW64\WindowsPowerShell\v1.0\powershell
- Browse to the Recovery folder :cd 'C:\inetpub\wwwroot\Citrix\StorageCenter\Tools\Disaster Recovery'
- Run the Recovery script :.\DoRecovery.ps1

The recovery process will offset importing the deleted files from the fill-in location to the persistent storage folder. When the DoRecovery.ps1 script finishes the files are available in your ShareFile environment again.
Summary
Although the procedure to recover deleted files in ShareFile works fine, information technology takes quite some steps to get the data back into the customer manages StorageZone. It'south non something you would want to do on a daily ground. I certainly hope the ShareFile team is going to change the difficult coded Recycle Bin retentivity time in the nearby hereafter, so we are able to dramatically increase the retention value. Sure, a large Recycle Bin retentivity time will increase the CIFS share size, just in my stance this does not outweigh the effort needed to recover files from backup.
Source: https://www.rinkspies.com/2014/10/07/how-to-recover-files-and-folders-in-citrix-sharefile-customer-managed-storagezone/
Posted by: schwabcasere.blogspot.com
0 Response to "How To Upload A File Into Citrix"
Post a Comment